TANG JU YI
Architecture Degree Portfolio
BIM
Project 1
BIM Applications in AEC Infographics
Understand the applications and research of Building Information Modeling (BIM) in Architecture, Engineering & Construction (AEC).
Project 2a
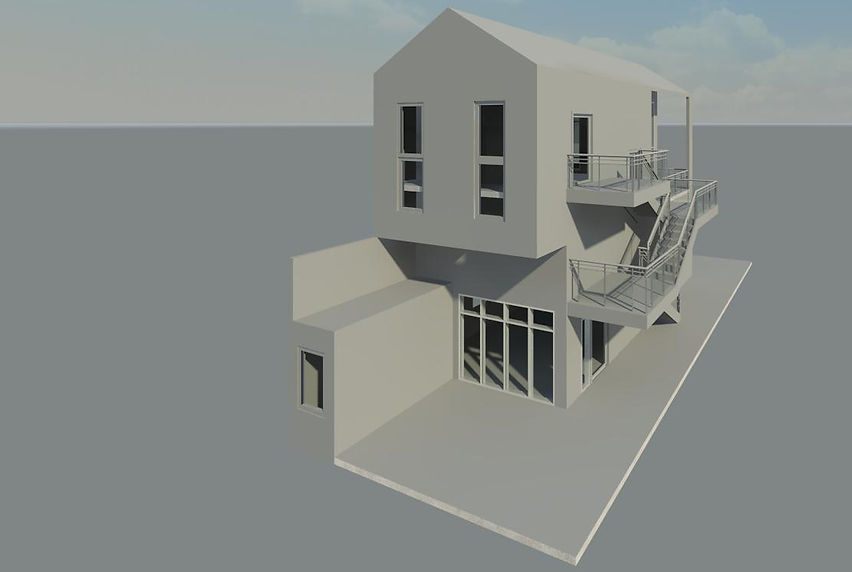
Building Modeling
LEARNING OBJECTIVES
-
To learn access and build up databases to produce a simple BIM model and architectural details complete with integrated information of materials; and their manipulation to have quick options in a given situation.
-
To use BIM as a design tool to create 3 dimensional models to analyze the aesthetics and technical requirement.
Part 1:
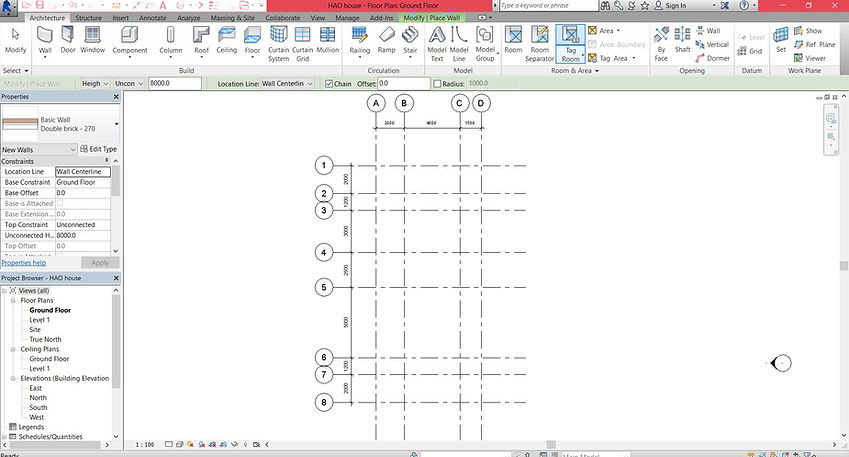
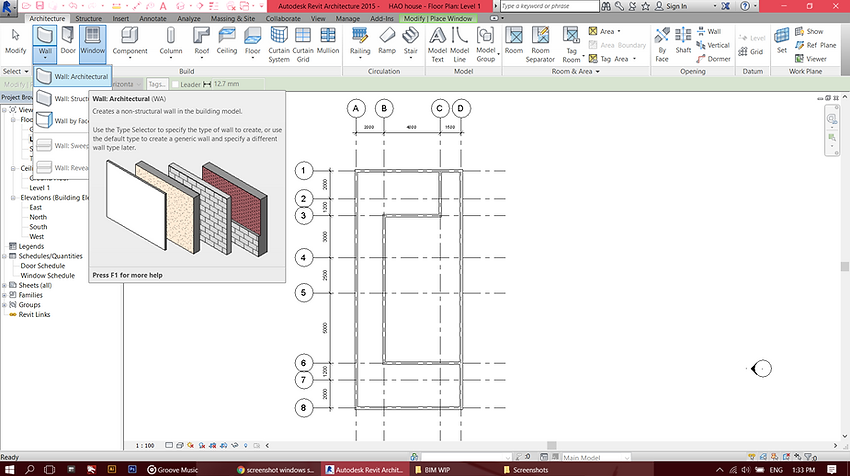
1. Create gridlines by selecting "Gridline" Tools
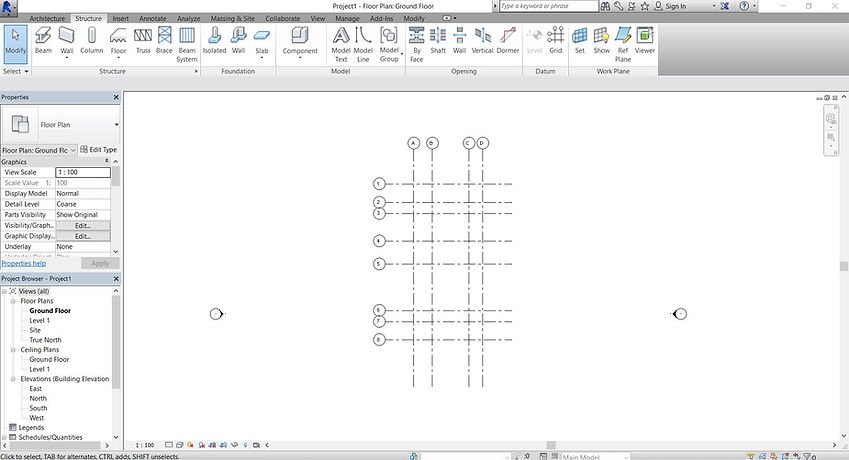
2. Annotate the gridlines
-
Annotate > Aligned
-
Create Generic wall
-
Architecture > Wall > Architectural
3. Using Line tool and outline the Ground floor wall based on the gridlines

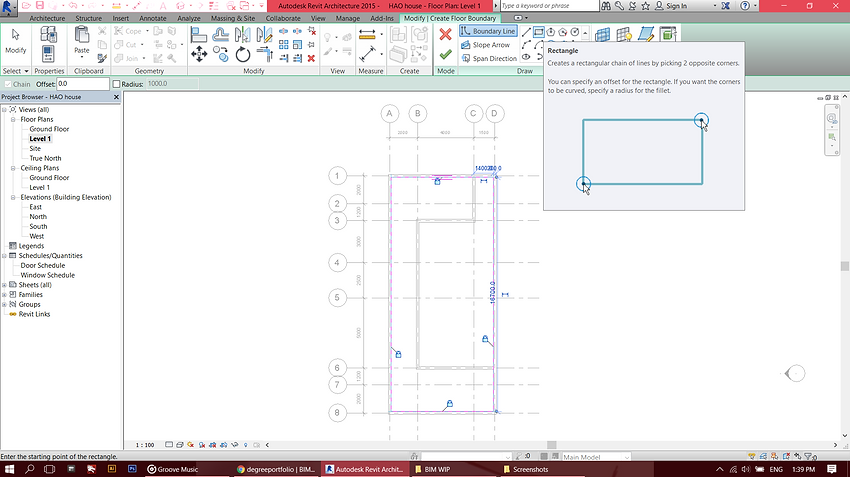
4. Create Flooring by:
-
Architecture > Floor> Architectural: Floor
-
Using rectangular and outline the inner corners of the walls.
-
Lock all sides of the flooring to prevent accidental sliding while maneuvering other components.
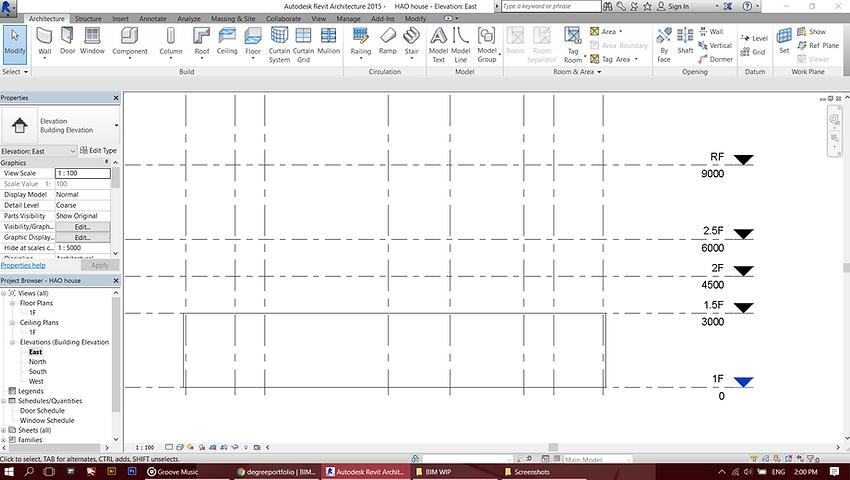
5. Go to East Elevation under Project Browser on the left side.
-
Create the levels by using 'Level' Tool and name each floor.
-
Using "Align" tool under modify tab to align all ground floor walls .
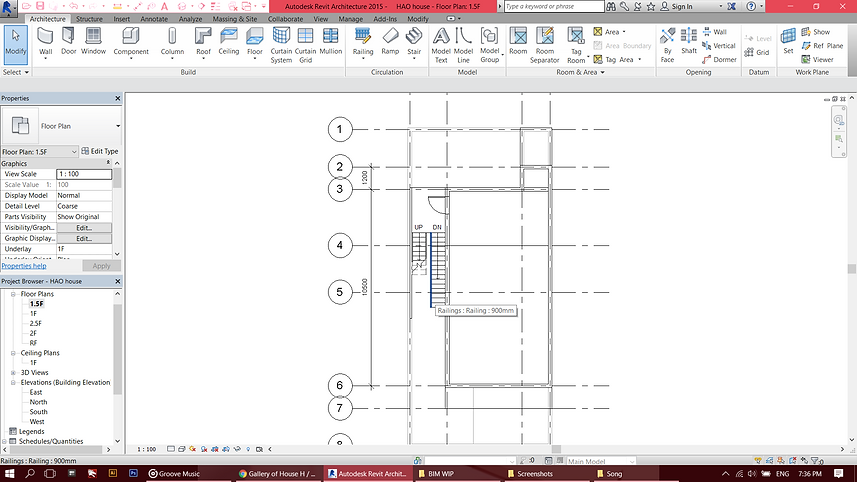
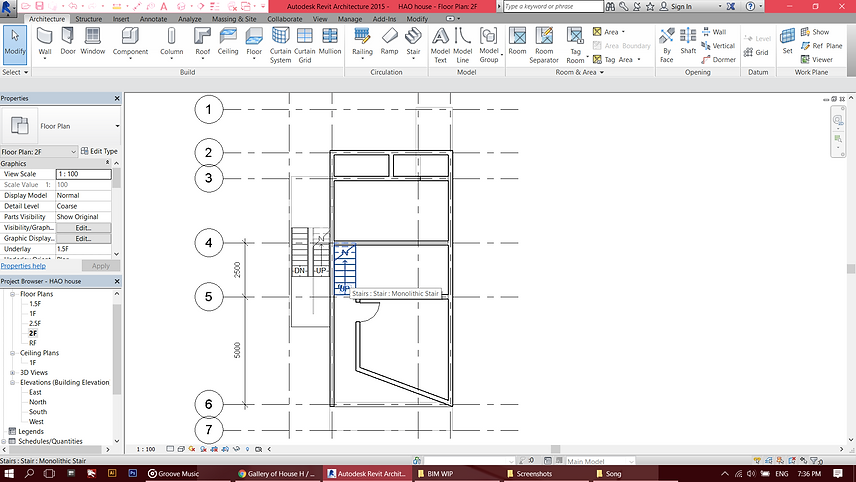
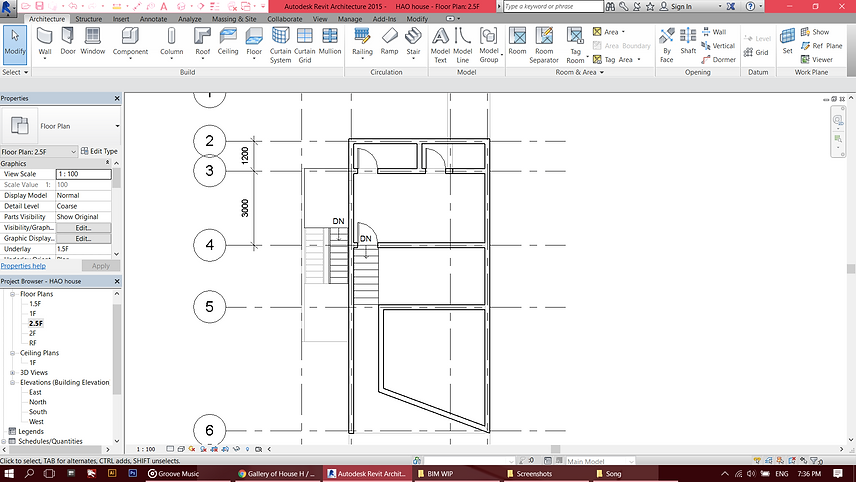
6. Adding STAIRCASE
-
Architecture > Stair > Stair by Sketch
-
This allows your to sketch instead of having a generic staircase component and can be customized.
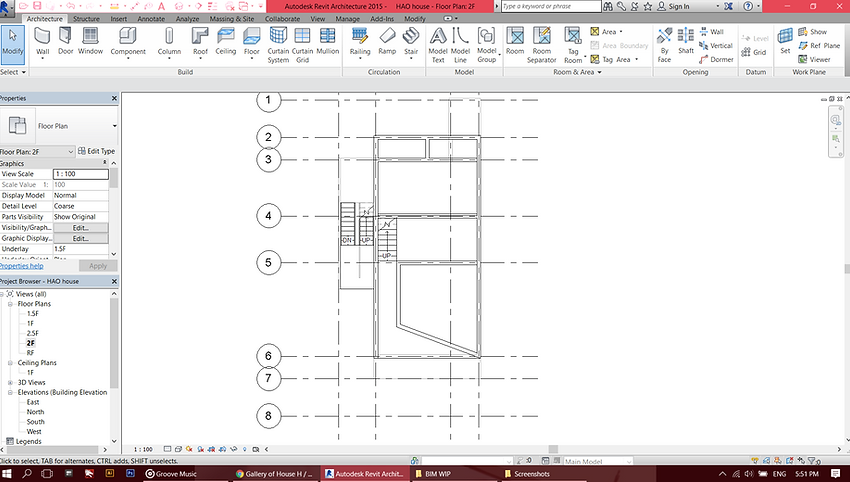


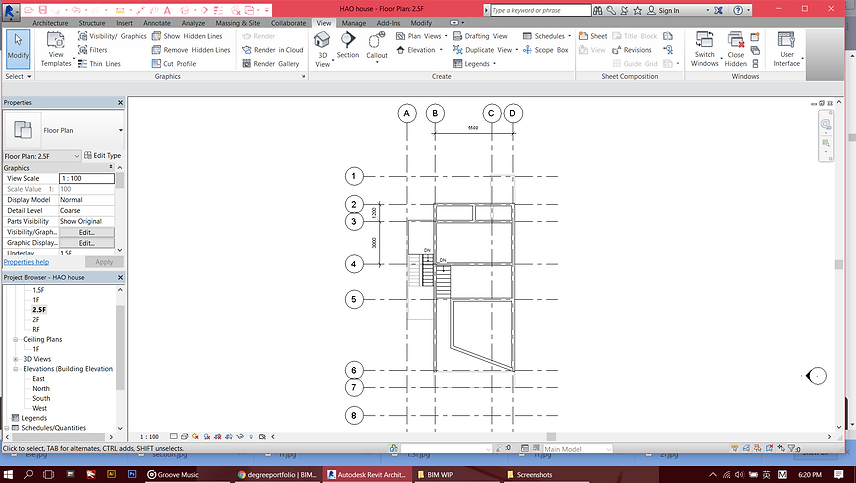
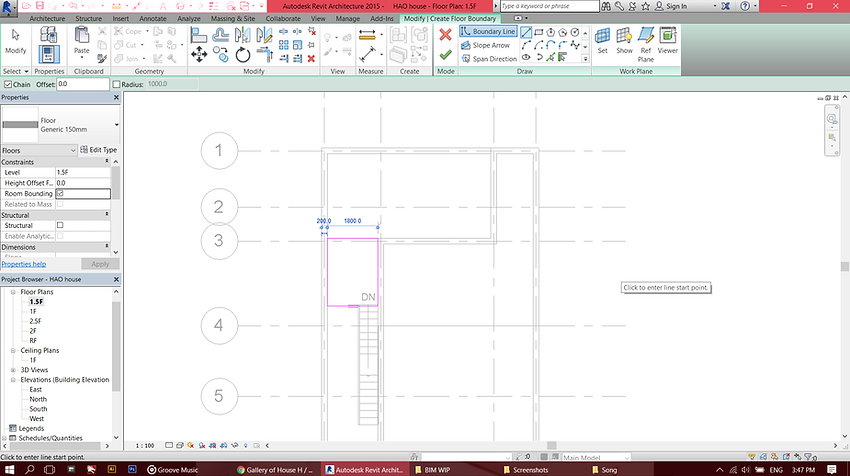
7. Create Level 1.5, Level 2, Level 2.5 by:
-
Architecture > Floor> Architectural: Floor.
-
Line Tool and select the inner corners of the wall.
-
Line tool is selected so the the Opening of the staircase can be avoided.
8. Create the Walls by:
-
Architecture > Wall> Architectural: Wall
-
Generic basic wall
-
Annotate > Aligned > Annotate the dimension on the gridlines
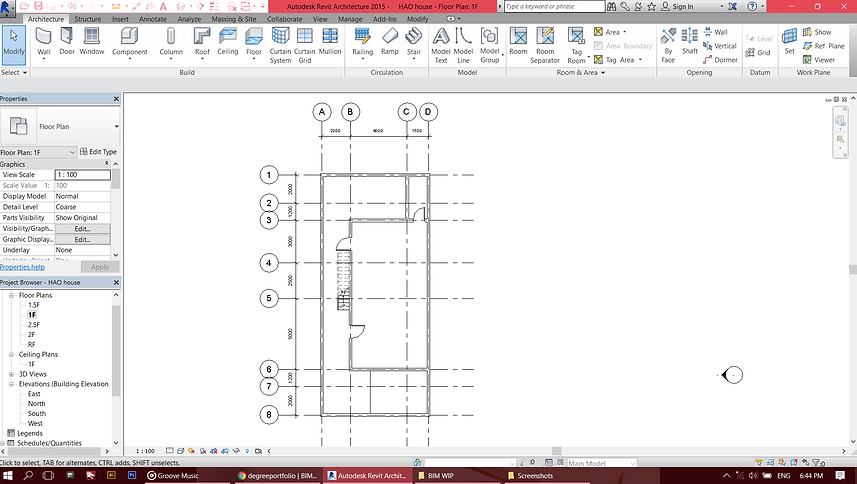
9. Adding the doors
-
Architecture > Doors
-
Flip the instance hands to desired direction of doors opening
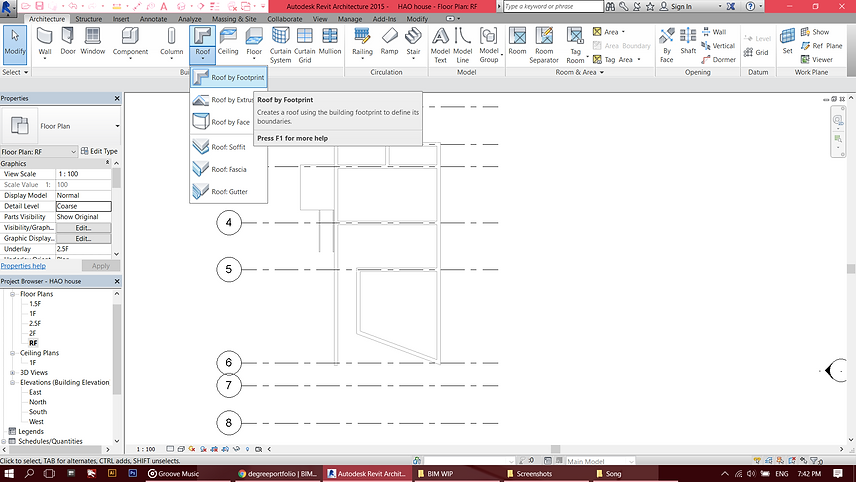
10. Create pitch roof by:
-
Architecture > Roof > Roof by Footprint
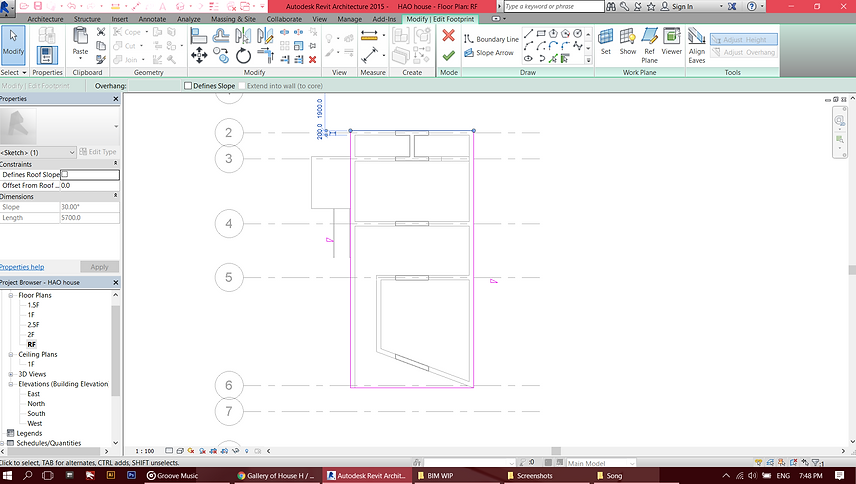
-
Select Line tool
-
Set the offset as 900mm as the overhang of the roof
-
Outline the building on the ROOF LEVEL by the project browser

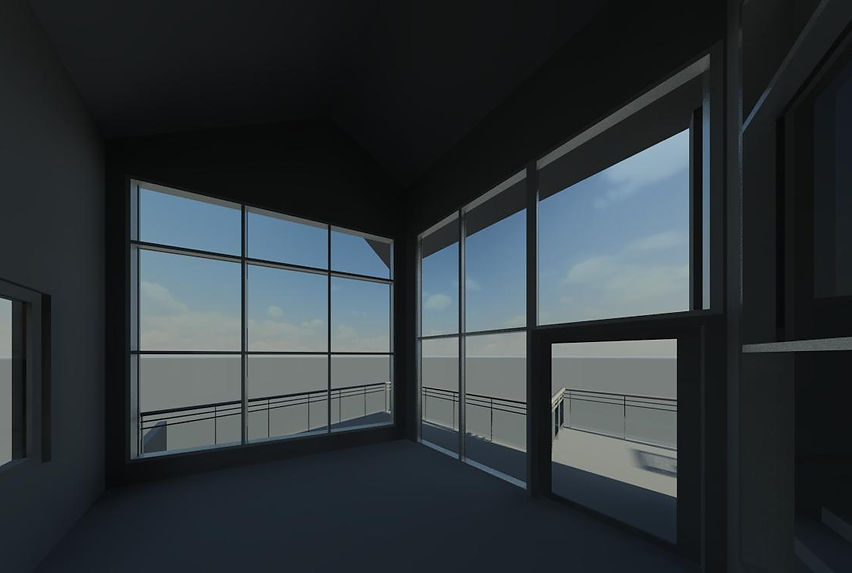
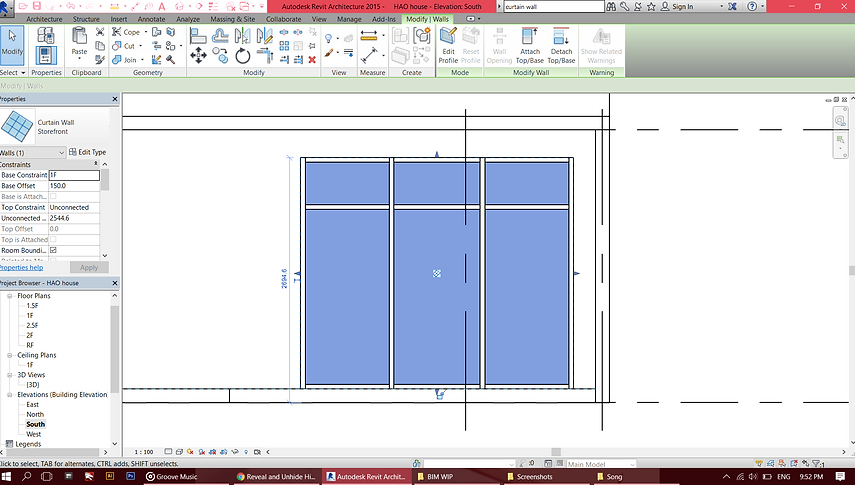
11. Create Curtain Wall
-
Select the wall desired > Select Edit Profile > Draw the boundary of wall to be punctured
-
Select Architecture Wall > Curtain Wall > Insert the wall and adjust the boundary line to fit the wall
PART 2:
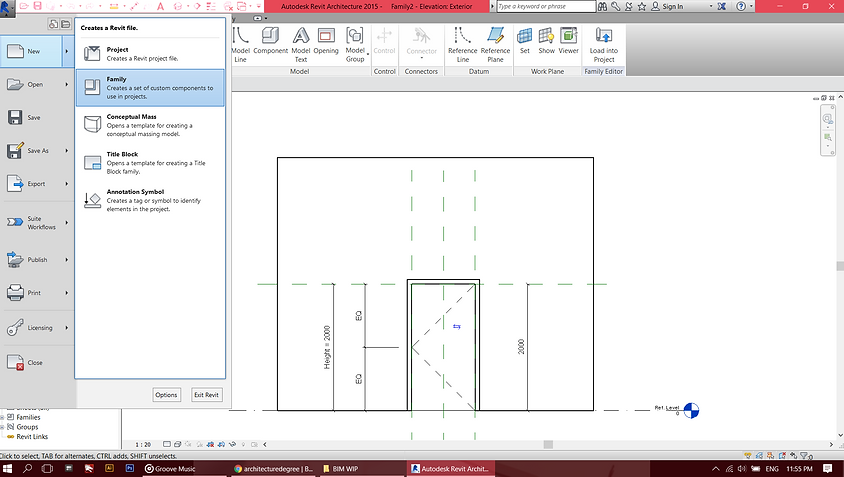
1.Create a new family:
-
New > Family
-
Metric Door
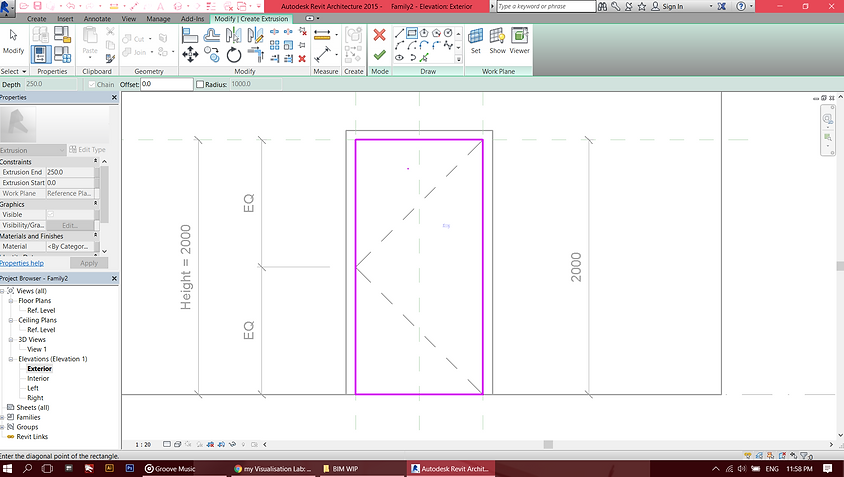
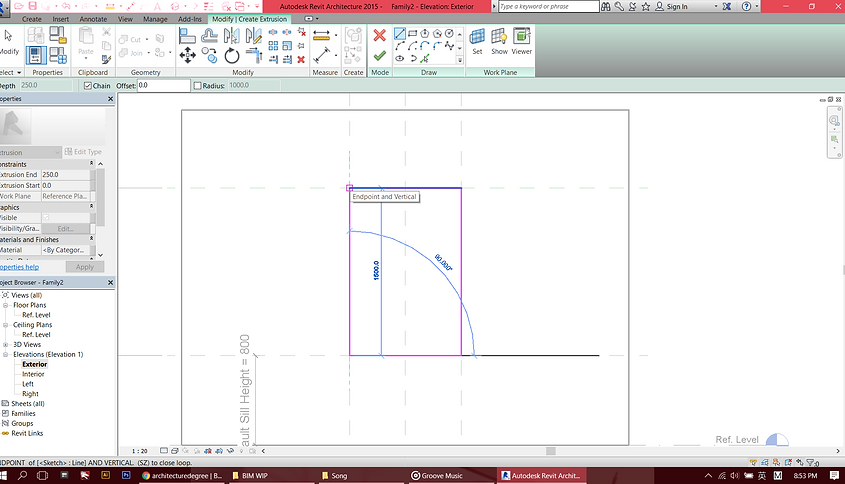
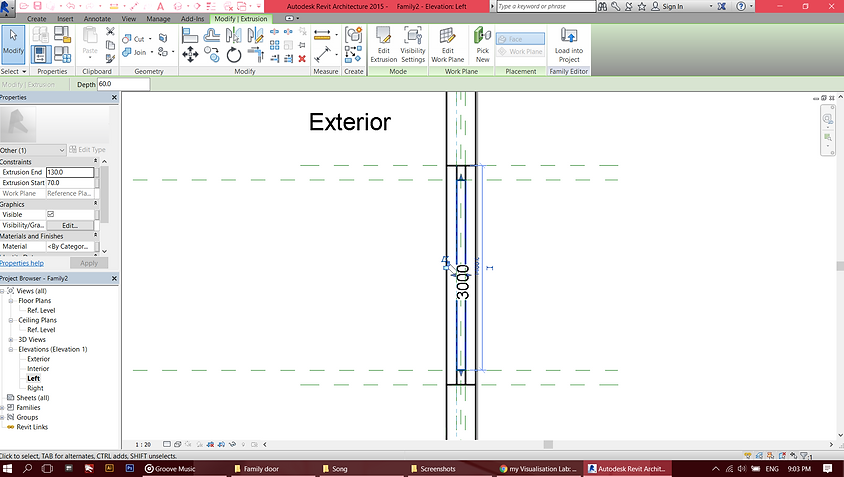
2. Create Extrusion
-
Go to Exterior > Select Extrusion under Create tab
-
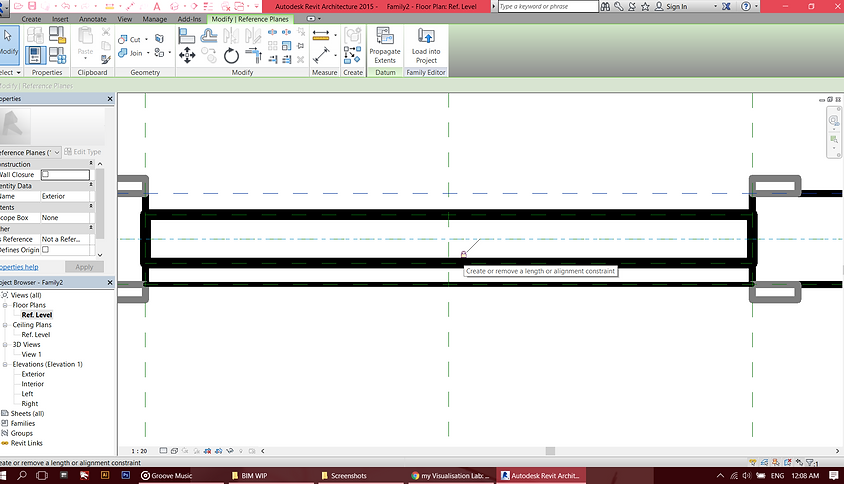
Use the rectangle line tool following the reference line > After done, click Constraint Lock
-
Switch to plan view to adjust the thickness of the door
-
Create reference plane > stretch the door to meet the Reference plane > Click Constraint Lock
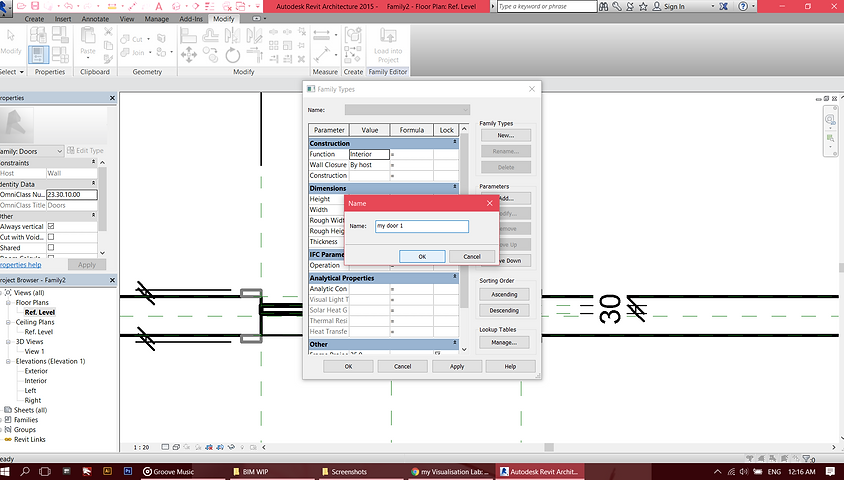
3. Click Family Types button > Create New Family for the door family.
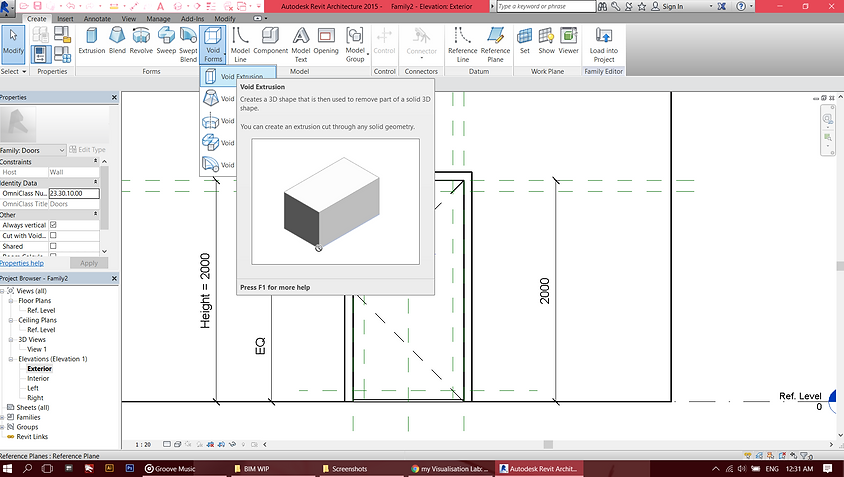
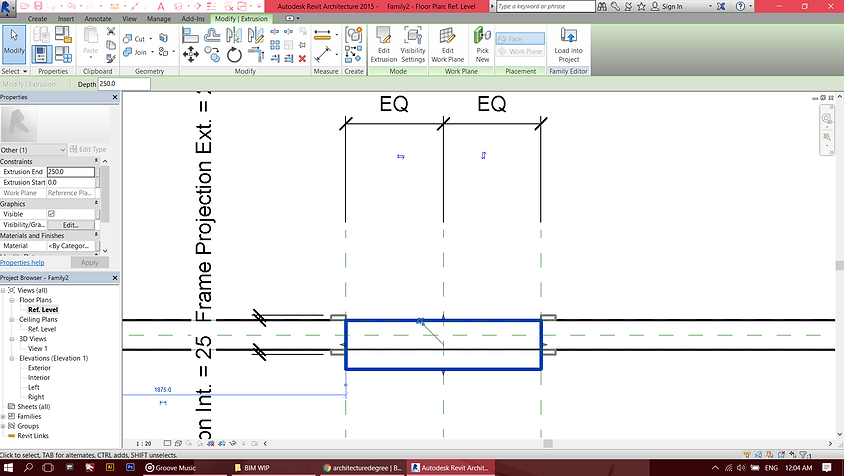
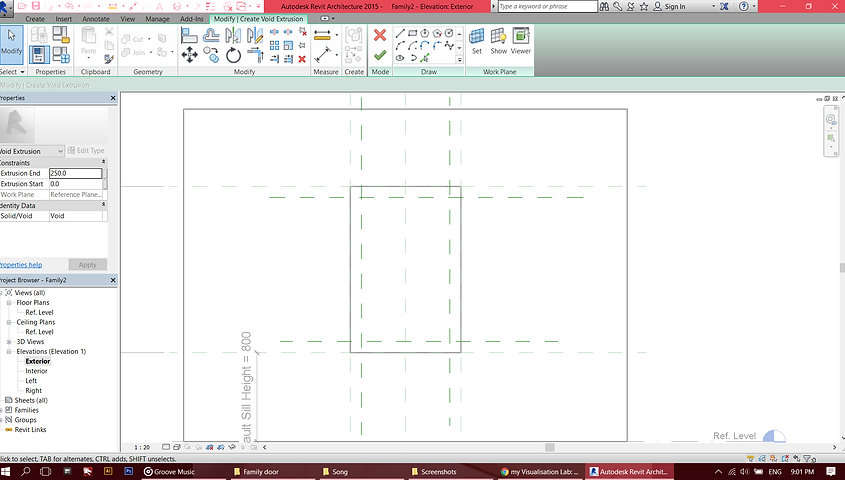
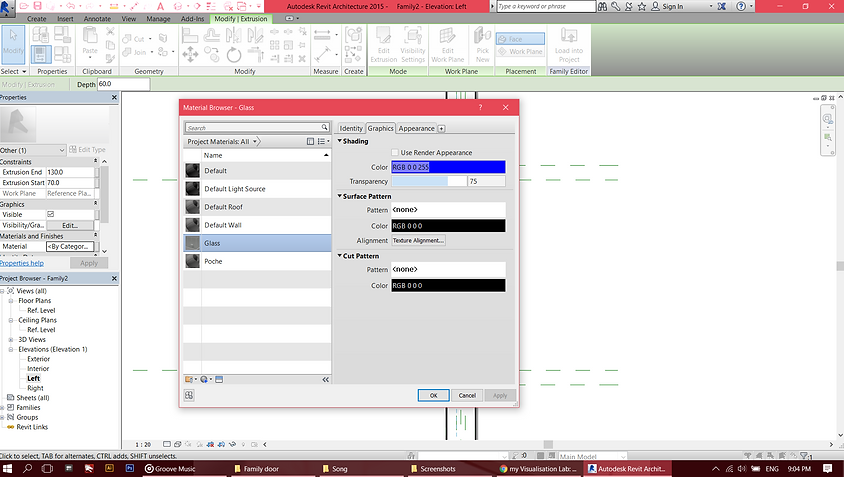
4. To create glass panel
-
Create new Reference Planes
-
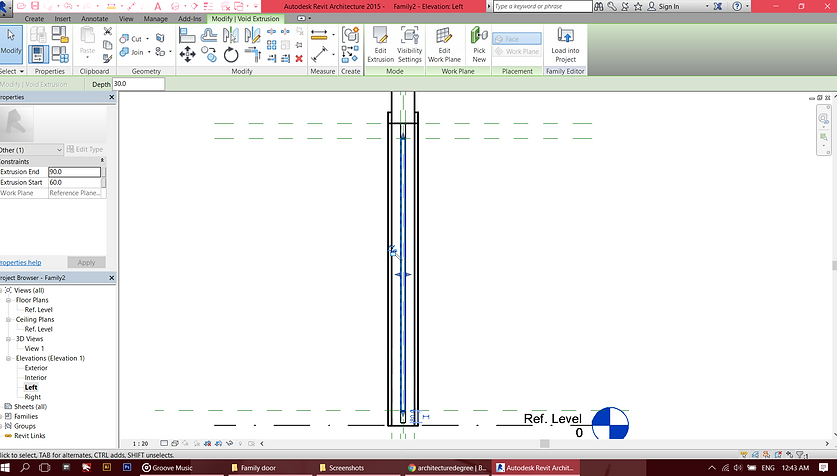
Create openings using Void Extrusion
-
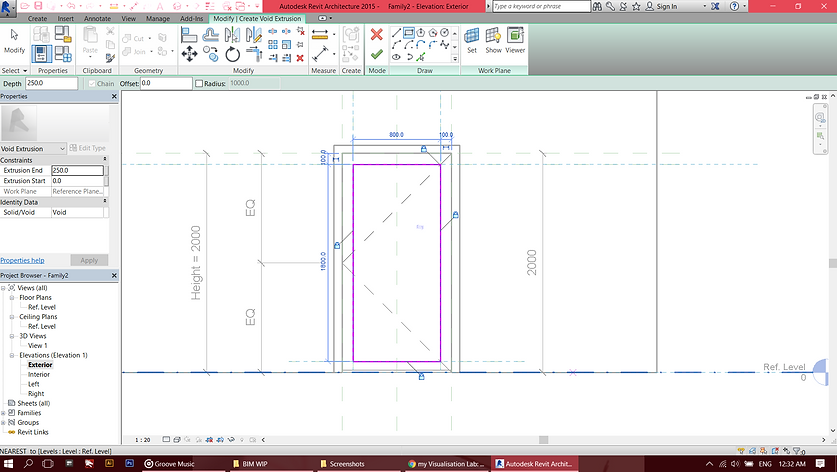
Go to Extrusion > Use Rectangle drawing line tool and draw the opening following the reference plane > Apply Constraint Lock
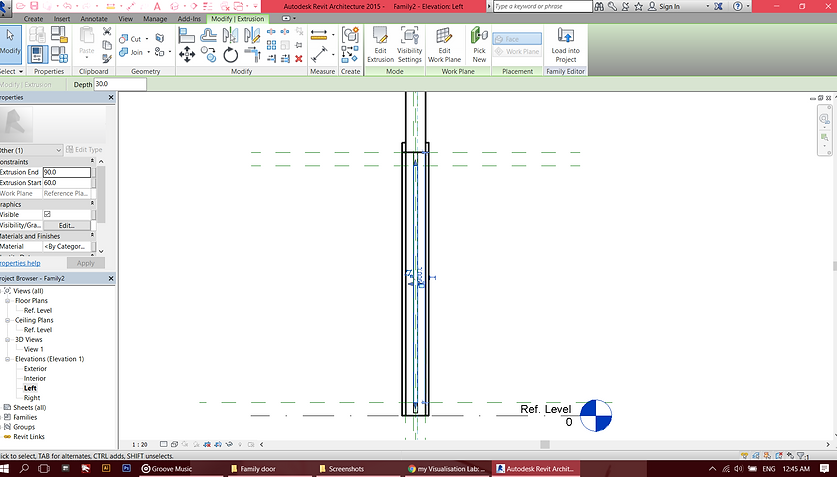
-
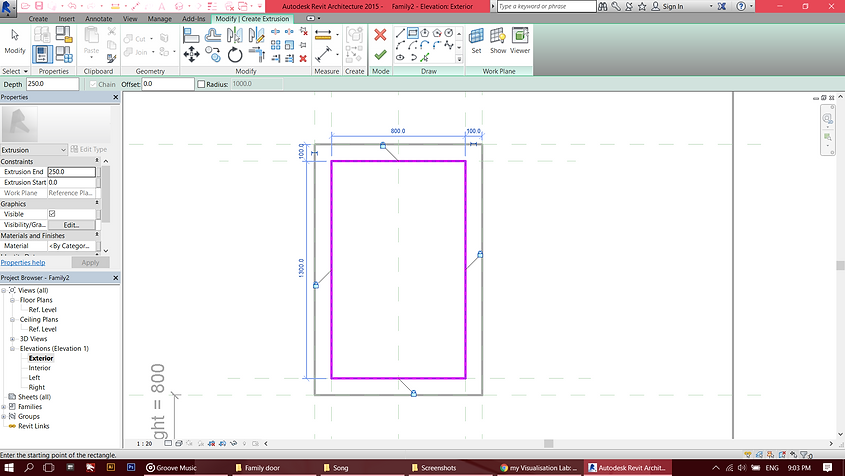
Got to Side View > adjust thickness of extrusion to suit the door frame > Apply Constraint Lock
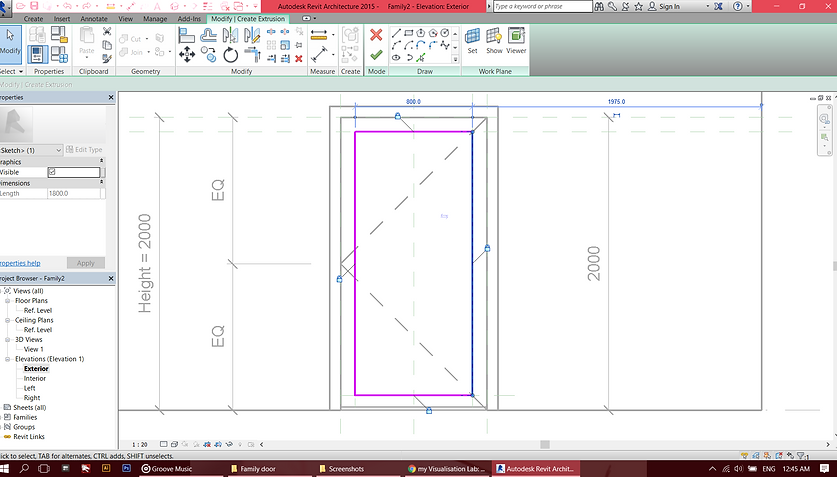
-
Select Extrusion > Draw the outline of glass panel using Rectangle line tool > Apply Constraint Lock
-
Go to Side View to adjust panel thickness > Apply Constraint Lock
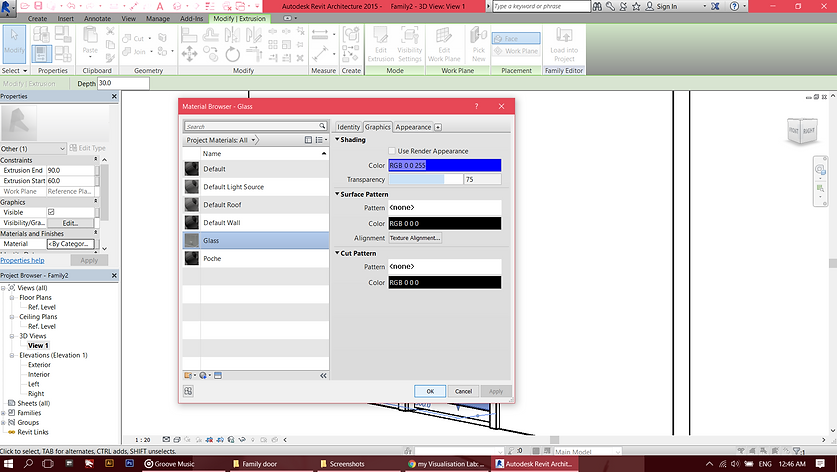
-
Change the material of the panel to glass
PART 3:
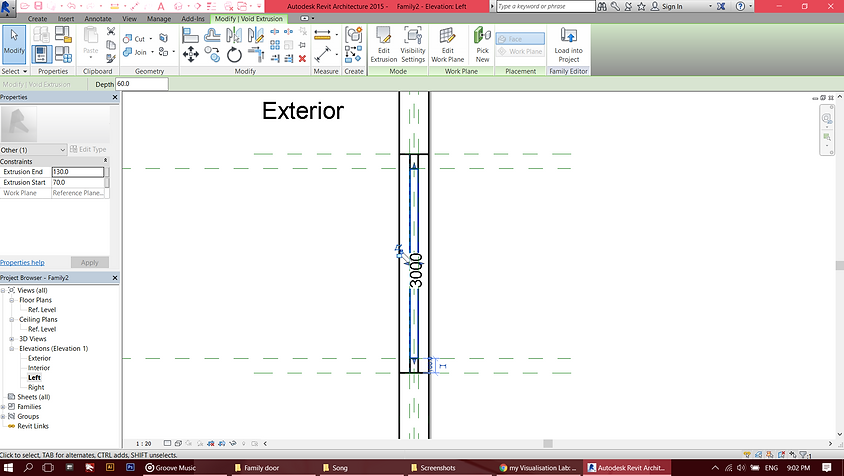
-
Create window family
-
Create reference plane
-
Create Extrusion > draw according to the reference plane using rectangle line tool > Constraint Lock
-
Go to Plan view > Adjust the thickness > Constraint Lock
-
Go to Exterior > Create Void Extrusion > draw the extrusion outline using rectangle line tool > Adjust thickness > Constraint Lock
-
Create Extrusion for glass panel > draw according to the reference plane using rectangle line tool > Adjust thickness > Constraint Lock
-
Change material to Glass
3D view