TANG JU YI
Architecture Degree Portfolio
BIM
Project 2B
BUILDING DOCUMENTATION
1. Floor Plan
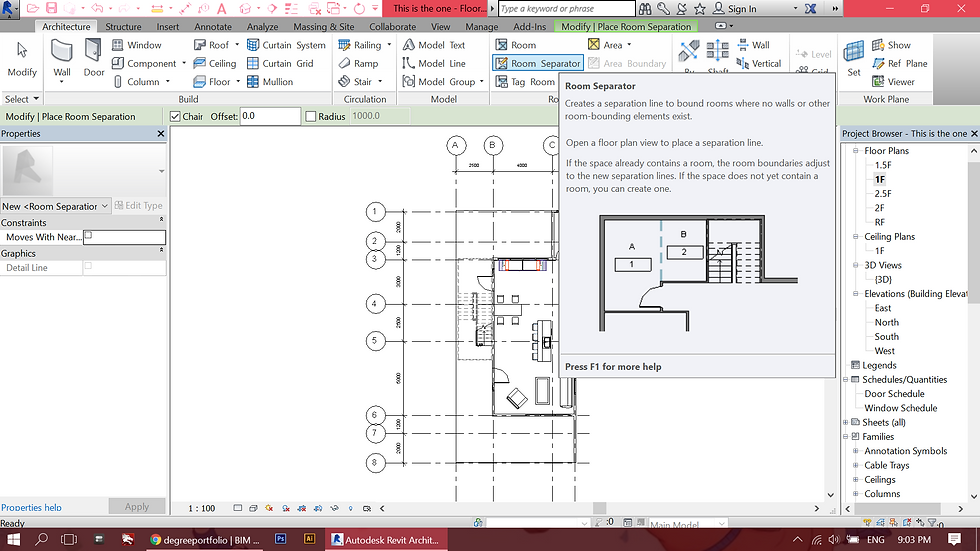
To annotate room tags, use the "Room Separator" tool on Architecture tab to determine space boundary for each space.

Use rectangular or line tool to outline each space and lock them.

Cange Space Type: Room Color Scheme: Name
To annotate room tags, use the "Room Separator" tool on Architecture tab to determine space boundary for each space.
2. Roof Plan

Roof plan > under the properties tab, uncheck the underlay option to none to produce clean line roof plan.

Select the roof > select the desired roof type and edit type

For every level below > use the same method which is changing the underlay to roof plan > sketch out the roof outline to indicate roof overhang > change underlay back to none when done.
Roof plan > under the properties tab, uncheck the underlay option to none to produce clean line roof plan.
3. Door and Window Tag

Under Annotate tab > go to category "Tag by Category" > Label each window and door

Edit and modify the labels that suits the plan > Repeat steps for every floor plans
Under Annotate tab > go to category "Tag by Category" > Label each window and door
4. Furniture Layout Plan

Duplicate views for all floor pans.

Rename each plans to furniture layout plans.

Changes in the color of the furniture outline.
Duplicate views for all floor pans.
5. Furniture Schedule & Room Schedule

Go to view > Schedule/ Schedule quantities to create Furniture schedule.
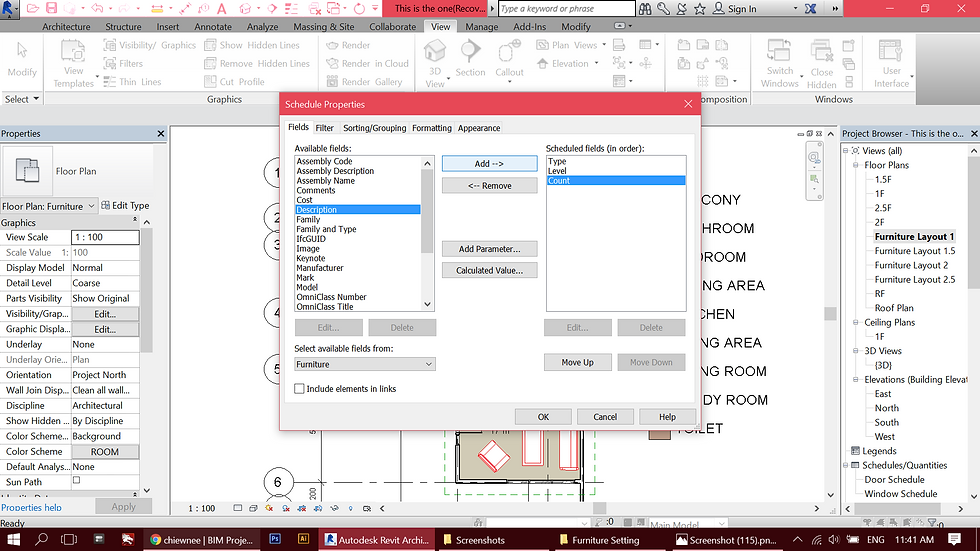
For Furniture Schedule > Select type, level and count.

Room schedule is created.
Go to view > Schedule/ Schedule quantities to create Furniture schedule.
6. Section & Callout Sections

Create 2 sections from plan view.

The section views will appear on the project browser.

Repeat steps and create the second callout section.
Create 2 sections from plan view.
7. Exploded Isometric
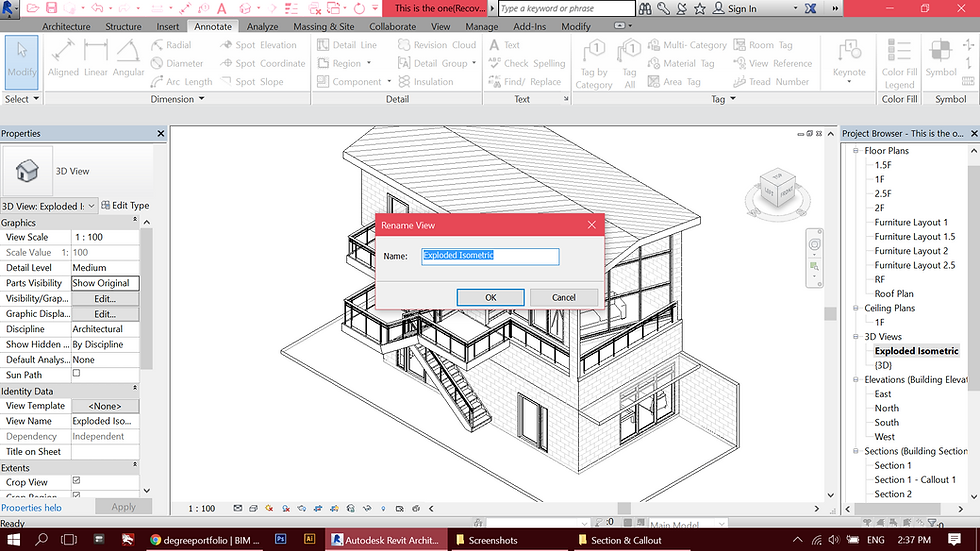
Duplicate 3D view > Rename Exploded Isometric.

Select element > click Modify tab > Displace elements. Select edit to add or remove elements for each group.

Exploded Isometric view.
Duplicate 3D view > Rename Exploded Isometric.
8. Phasing
8. Phasing

The selected plan is duplicated for three times for: 1. Existing 2. Demolished 3. New construction

Under manage tab > select phase to make changes for phase setting.
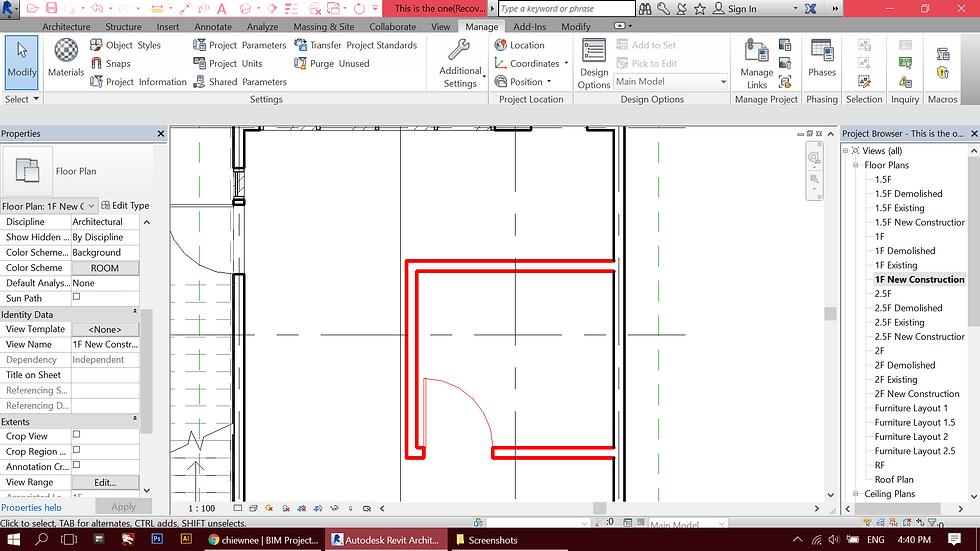
On the New Construction phase, the newly added walls will be shown in red solid lines.
The selected plan is duplicated for three times for: 1. Existing 2. Demolished 3. New construction